DIY Christmas Gift Ideas

I love the idea of giving friends and family something a little more personal and heartfelt for Christmas in addition to store-bought gifts from their wish list. It’s easy to reuse fancy jars, glitter and Christmas ornaments laying around the house for a quick and easy homemade Christmas present or stocking stuffer!

Snowglobe

diy snow globe

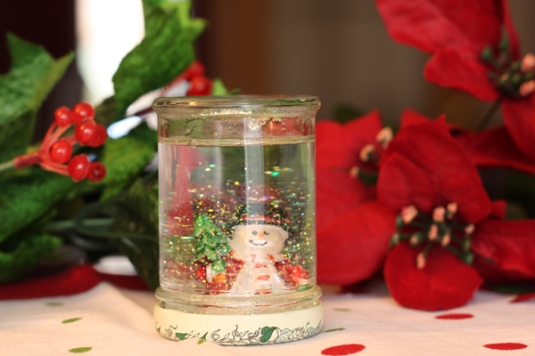
Materials: Small reused jar, old Christmas ornament, glitter, baby oil and super glue.

1. Find a small jar and fill it up with baby oil, which will make the glitter fall slower. Fill the jar to the brim as much as you can.
2. Add a teaspoon of glitter.
3. Find a small Christmas ornament, remove the rope that is used to hang it on the tree, and add super glue to the bottom of the figurine. Hold it steady on the jar cap for at least a minute, and then let it sit on the super glue for a few more minutes. Once the super glue is dry and the figurine is stuck securely to the cap, flip it upside down and screw it to the jar.

Cookie In A Jar

cookie in a jar

Who doesn’t love cookies?

Materials: reused jar, ribbon, Christmas card and dry ingredients from a cookie recipe.

1. Use our peanut butter chocolate chip cookie recipe for this one! Layer the dry ingredients in a clear jar.
2. Write out the recipe on a Christmas card, noting that all they have to do is mix together any wet ingredients in a bowl, and then dump the contents of the jar and mix.
3. Attach the recipe to the jar with a ribbon.

Lemon ‘cake’ sugar scrub

This smells like lemon cake. Need I say more?

sugar scrub

Materials: One cup sugar, half cup vegetable glycerin, one tablespoon grated lemon zest, a small reused jar, Christmas card and ribbon or bow.

1. Mix one cup sugar, half a cup vegetable glycerin and one tablespoon grated lemon zest in a small bowl until mixture is smooth.
2. Pour into a small jar and attach a small Christmas card and ribbon or bow. Don’t have vegetable glycerin? Use olive oil. Leave a note attached to the jar cautioning the recipient to wipe off the bathtub floor as oils are slippery.

– Silvia

This is an excerpt from an article I wrote for The Reflector. Check out the full article here.

How to Make Pumpkin Puree

One year I decided I would be ambitious and make pumpkin puree from scratch. There’s nothing like scooping out goop from the pumpkin with your fingers and getting stringy orange bits in your hair. It brings new meaning to the phrase “getting your hands dirty.”

Am I selling this to you yet?

Just kidding. It’s really not that messy, and it makes your pumpkin pie just that much sweeter.

And the roasting pumpkin smell that fills the house is so worth it.

I made puree from sugar pumpkins as they are sweeter and have more flavour. A sugar pumpkin won’t have much guts, as its grown for its thick flesh that you can make into puree. It’s the one on the left in the picture below.

Pumpkin Puree

1. Find a sugar pumpkin at your local Farmer’s Market. Regular grocery stores will carry them as well. Cut the pumpkin in half. Use a big, sharp kitchen knife and be careful as it will be quite difficult to cut. Watch your fingers!
2. Scoop out the pumpkin pulp and separate the seeds from the pulp. Save the seeds if you’d like to roast and eat them.
3. Discard the pulp.
4. Cut the pumpkin into slices like you would a watermelon and place on a baking sheet.
5. Bake the slices of pumpkin at 375 F for one hour and a half. You’ll know it’s done when you can easily pierce the flesh with a fork.
6. Remove the pumpkin from the oven and allow it to cool. When it has cooled, scoop the pumpkin flesh from the rind and put in a food processor and pulse until smooth. Discard the rind.
7. Store in a glass mason jar in the fridge for up to three days until ready to use the puree. You can also freeze the pumpkin in a plastic bag.

Next week we’ve got a pumpkin mini muffin recipe that will make use of this puree! Check back for it next Sunday!


My method originally appeared on The Calgary Journal Food Blog.

– Silvia

Low Sodium Vegetable Stock

Vegetable stock is so much cheaper to make at home, not to mention way tastier and healthier! Who wants to pay $6 a box for something filled to the brim with sodium?

Making your own vegetable stock is pretty simple. We like to keep a bag in the freezer with all the usable scraps from our veggies, which we’ll throw into the pot with regular veggies. You can throw in pretty much anything that is edible, like mushroom caps, parsley, the rough part of carrots, and any veggies that look like they are close to their expiration date.

If your fridge needs to be cleaned out, take the opportunity to make your own veggie stock! Or if you bought a big tray of delicious organic veggies for a party thinking that your guests would go for a healthy selection, but they stuck to the chips and salsa, use them up! Alternatively, buy the cheapest onions, carrots and celery you can find and add them to the pot with scraps.

Low Sodium Vegetable Stock

4 tbsp olive oil
1 yellow onion, chopped
1 red onion, chopped
4 garlic cloves, minced
1/2 pound carrots, chopped
1/2 pound celery, chopped
24 cups water
2 tsp salt
Kitchen scraps (mushrooms, parsley, broccoli stems, parsnips, etc.)

1. Heat olive oil on medium setting in a very large pot. Saute onions for 4-5 minutes, then add carrots, celery and garlic and saute for an additional 4-5 minutes.
2. Add all your vegetable scraps and then add 24 cups of water.
3. Cook on high until it starts to boil, then lower heat to medium low and cook covered for two hours.
4. When it’s done, strain the stock over a sieve covered with two layers of cheesecloth.
5. Divide the mixture into 1 and 2 cup portions and freeze. Use as needed when a recipe calls for vegetable stock.